How to Choose a Hallway Coat Rack Wall Mounted?

Choosing a Hallway Coat Rack Wall Mounted can transform a narrow entrance into a practical, welcoming space. It can also make a small hallway feel unexpectedly crowded. The right choice depends on wall width, household habits, coat volume, and daily movement. Measure the available wall before browsing styles. Leave enough clearance for doors, drawers, and passing shoulders.

Interior designer Nate Berkus offers a useful design principle: “Your home should rise up to greet you.” A wall-mounted coat rack can achieve this when it supports real routines. Imagine arriving with a wet jacket, a school bag, and two sets of keys. Strong hooks, smooth edges, and a reachable height matter more than decorative details. Families may need several hooks, while a compact apartment may benefit from a folding design. Entryway storage should serve people, not merely photograph well.

Material deserves close attention. Solid wood can add warmth, while powder-coated metal may suit a modern interior. Check the mounting hardware carefully, especially on drywall or masonry. A beautiful rack can fail when installed on an unsuitable surface. Weight capacity should match winter coats, handbags, umbrellas, and occasional extra items. Do not assume every hook carries the same load.

There is no perfect rack. Some models look elegant but offer little capacity. Others store more but appear visually heavy. Review dimensions, installation instructions, and customer feedback before deciding. Consider cleaning, replacement parts, and future household changes. The best Hallway Coat Rack Wall Mounted option quietly reduces clutter without turning the entrance into a storage wall. That balance takes a little thought, and sometimes a second measurement.
How to Choose a Hallway Coat Rack Wall Mounted?

Assess Your Hallway Space and Storage Needs

How to Choose a Hallway Coat Rack Wall Mounted?

Assess your hallway before choosing a wall mounted coat rack. Measure the clear wall width, ceiling height, and walking space. Check whether doors, drawers, or radiators open without touching the rack. A hallway can feel crowded quickly. Leave enough clearance for shoulders and shopping bags, especially near narrow corners. Mark the proposed position with removable tape for one day. This simple test often reveals problems that measurements miss.

Count the items the rack must hold each day. Include coats, school bags, scarves, umbrellas, and dog leads. Add space for guests and seasonal clothing. Five hooks may sound sufficient, but bulky winter coats need more room. If several people share the hallway, choose separate zones or staggered hooks. Keep frequently used items between waist and shoulder height. Children need reachable hooks, while heavier bags require stronger fixing points.

Wall construction also affects the decision. Brick, plasterboard, and timber may need different anchors. Locate solid studs where possible, and follow the fixing instructions carefully. I once placed a rack too close to a door; the coats brushed against it every morning. It worked on paper, but not in daily life. Check the wall after installation and tighten fittings if movement appears. A neat rack is useful only when the hallway remains easy to move through.
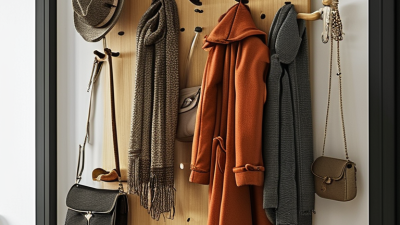
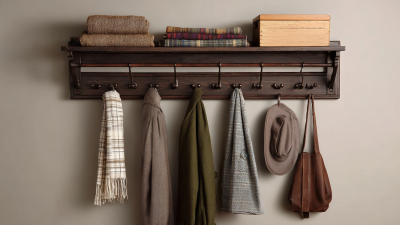
Choose the Right Coat Rack Size and Mounting Position

How to Choose a Hallway Coat Rack Wall Mounted?

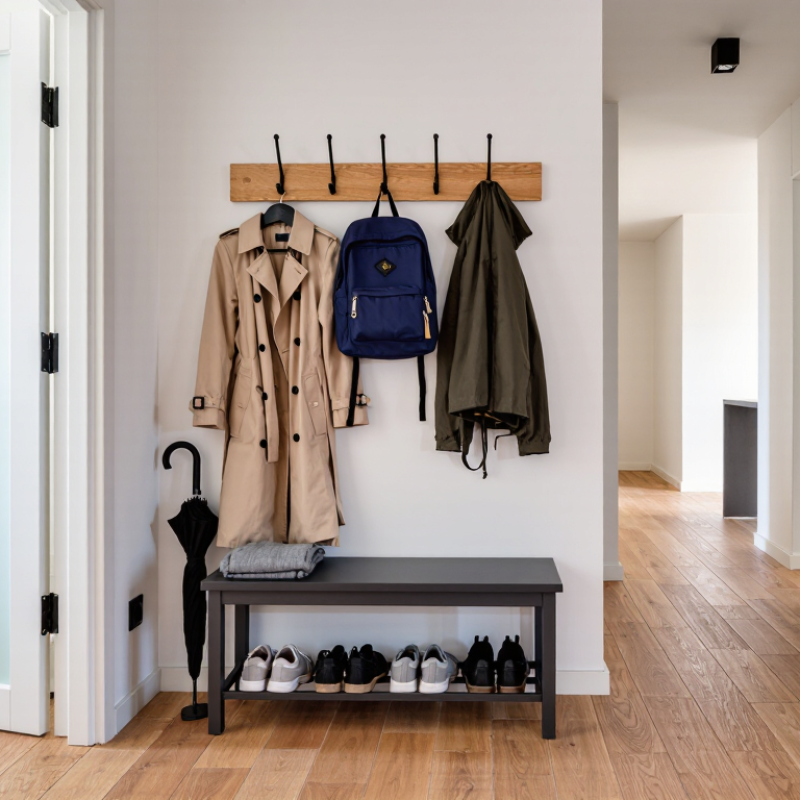
Choose a rack that fits the wall, not merely the number of coats you own. Measure the clear wall width beside the door. A rack using about two-thirds of that space usually looks balanced. Leave at least 6 inches between hooks to prevent sleeves from overlapping. For bulky winter coats, allow more room. A shallow rack, around 8 to 12 inches deep, keeps narrow hallways easier to pass through. Count daily users, too. Five hooks may be excessive for one person, but insufficient for a busy family.

Mounting position affects comfort and safety. For most adults, place the hooks about 60 to 66 inches above the floor. If children use the rack, install a lower section near 36 to 48 inches. Keep the rack clear of the door swing, light switches, and stair edges. When possible, fasten it into wall studs. Otherwise, choose anchors rated for the rack and the expected load. I measure twice before drilling. I still once mounted a rack too close to a corner, and thick coats blocked the walkway.

Tips: Mark hook positions with removable tape first. Hang one coat as a test. Check the lowest coat against the floor. Keep about 12 inches above a bench for comfortable seating. Recheck the spacing after installation; real coats are often wider than expected.

Compare Materials, Styles, and Weight Capacities

A wall-mounted hallway coat rack should match your daily routine, not only your hallway’s appearance. Solid wood offers warmth and usually handles repeated use well, but it may feel heavy on plasterboard. Powder-coated steel provides a slimmer, modern look and resists scuffs. However, low-quality finishes can chip around busy hooks. Bamboo is light and attractive, although its weight rating depends strongly on its construction.

Style also affects capacity. A rail with five evenly spaced hooks suits coats, bags, and scarves. Individual pegs create a cleaner look but may place more force on one fixing point. Check both the total capacity and the rating for each hook. A rack marked for 30 kilograms may allow only 6 kilograms per hook. Winter coats can weigh more than expected when wet.

Tips: Measure the wall and door swing first. Check whether the wall is solid masonry, wood framing, or hollow board. Use suitable anchors, and follow the installation instructions carefully. Do not judge strength by appearance. A beautiful rack can still pull loose.

For frequent family use, choose reinforced metal or solid wood with wide mounting plates. For lighter use, a compact rack with three hooks may be enough. Leave space between hooks so sleeves do not overlap. I once underestimated that detail, and the hallway looked messy within days. Rounded edges are useful near children, while darker finishes hide small marks better. Recheck the screws after several weeks, because walls and fixings can settle slightly.

How to Choose a Wall-Mounted Hallway Coat Rack

Metal racks generally provide the highest load capacity, while solid wood and bamboo offer a warmer appearance with moderate capacity. MDF racks are suitable for lighter everyday use. Actual performance depends on the wall type, mounting hardware, rack width, and installation quality.

Check Installation Requirements and Wall Compatibility

Choosing a wall-mounted hallway coat rack starts with the wall, not the rack. Measure the available width, height, and depth beside doors or stairs. Leave enough clearance for coats to hang without blocking movement. A narrow hallway may need a shallow design.

Check the wall structure before drilling. Solid brick, concrete, and timber studs usually provide reliable support. Drywall alone may not hold several heavy coats, especially when wet. Use suitable anchors for light loads, or fasten directly into studs for better security. Never rely on appearance alone. Use a stud finder, and check for hidden pipes or electrical cables before making holes.

Review the rack’s stated weight capacity and include the weight of bags, scarves, and winter clothing. Mark each fixing point carefully, then confirm that the holes are level. I once trusted a pencil mark without checking the floor, and the rack looked slightly tilted. Small mistakes become obvious in a hallway. For masonry, choose the correct drill bit and wall plugs. For plasterboard, select anchors designed for its thickness. The supplied screws may not suit every wall.

After installation, pull the rack gently before adding coats. Listen for movement or cracking sounds. If the wall flexes, stop and reassess the fixing method. Children may pull on lower hooks, so place the rack securely and avoid creating sharp obstacles near walking paths. A professional installer can help when the wall is unusually thin, damaged, or uncertain.

How to Choose a Hallway Coat Rack Wall Mounted? - Check Installation Requirements and Wall Compatibility
Selection Dimension Recommended Requirement Why It Matters Suitable Wall Conditions Installation Check
Rack Width Approximately 40–80 cm for most residential hallways Provides useful hanging space without excessively narrowing the passage. Suitable for entry walls, narrow corridors, and apartment foyers. Measure the available wall width and leave clearance from doors, switches, and corners.
Projection from Wall Preferably no more than 10–15 cm when hooks are folded or unloaded A shallow profile reduces the chance of people catching clothing or shoulders on the rack. Best for narrow hallways and high-traffic walking routes. Confirm that the rack will not obstruct door swing, cabinet doors, or the required walking path.
Mounting Height Commonly 150–170 cm above the finished floor for adult outerwear Allows comfortable access while keeping coats clear of the floor. Adjustable for children, wheelchair users, or households with mixed user heights. Mark the height with masking tape and test reach before drilling.
Expected Load Choose a rack with a stated capacity above the combined weight of the intended coats and bags Overloading can pull fasteners from the wall or deform the mounting plate. Solid masonry and properly reinforced timber generally provide stronger support than unsupported drywall. Do not rely only on the number of hooks; verify the manufacturer-stated load rating and fixing method.
Concrete or Brick Wall Use masonry-rated screws with suitable wall plugs or anchors Masonry anchors transfer the load into a solid substrate rather than relying on surface material. Concrete, solid brick, and many solid block walls. Use a masonry drill bit, check for hidden cables or pipes, and clean dust from drilled holes.
Timber Stud or Solid Wood Fasten directly into the stud or solid wood with appropriately sized wood screws Direct fastening gives better holding power than fixing only into plasterboard or wall covering. Timber stud walls, solid wood panels, and reinforced timber backing. Locate the stud accurately and ensure the screw length provides sufficient embedment without penetrating hazards behind the wall.
Drywall or Plasterboard Use anchors specifically rated for hollow walls; fix into studs where possible Ordinary screws may pull out because drywall has limited resistance to tension and pull-out forces. Standard drywall or plasterboard when the selected anchor capacity matches the rack load. Avoid mounting a heavily loaded rack to unsupported drywall using basic plastic plugs alone.
Tile or Finished Surface Drill carefully through the surface with the correct bit, then anchor into the substrate Incorrect drilling can crack tiles or create a weak fixing that supports only the finish layer. Ceramic tile, porcelain tile, or decorative wall panels over a structurally suitable backing. Use low drilling pressure, avoid tile edges and grout where possible, and confirm the backing material before installation.
Mounting Plate A rigid plate with at least two spaced fixing points is preferable Multiple fixing points distribute the load and help prevent twisting when one hook is heavily used. Most wall types, provided the screws and anchors match the substrate. Check that all mounting holes can be aligned with solid fixing zones and that the plate sits flat against the wall.
Clearance Around Hooks Allow approximately 20–30 cm of usable vertical space per hanging position Prevents coats from overlapping excessively and makes individual items easier to remove. Useful for coats, scarves, hats, and lightweight bags. Check nearby artwork, mirrors, shelves, thermostats, and electrical switches before selecting the final position.
Moisture and Temperature Install on a dry, stable wall unless the rack is specifically suitable for damp areas Persistent moisture can weaken some wall materials and accelerate corrosion of metal hardware. Interior hallways and protected entry areas with normal indoor humidity. Avoid locations exposed to direct rain, leaking roofs, condensation, or frequent water splash.
Final Safety Test Test the rack gradually before placing its full intended load A gradual test can reveal movement, loose screws, wall flexing, or anchor failure early. All wall types and mounting systems. Tighten every fastener, apply light pressure in several directions, and inspect the wall after loading the rack.

Evaluate Safety, Maintenance, and Long-Term Value

A wall-mounted hallway coat rack should be judged by more than appearance. Safety starts with the wall, not the hook. Check whether the surface is drywall, masonry, or wood framing before selecting anchors. A loaded rack can pull against weak plaster and loosen without warning. Whenever possible, fix the mounting rail into studs or solid masonry. Use rounded hooks and keep sharp edges away from passing shoulders. Leave enough clearance for doors and walking paths. Mount lower hooks only when children can use them safely.

Maintenance is simple, but it is easy to neglect. Wipe dust and damp marks with a soft cloth. Standing moisture can stain finishes and weaken some materials. Inspect screws every few months, especially after coats become heavy in winter. Watch for wobbling, cracked joints, rust, or peeling surfaces. Repair early.

I once trusted a tight-looking hook and ignored a faint wall gap. The rack held for weeks, then tilted under several wet jackets. That experience changed my inspection routine, although my first repair was still too rushed.

Long-term value comes from reliable capacity, replaceable hardware, and a finish that tolerates daily contact. Compare the stated load limit with real use, including bags, umbrellas, and damp coats. A cheaper rack may cost more if anchors, hooks, or panels need frequent replacement. Choose dimensions that fit current habits without blocking future storage changes. Keep installation instructions and spare screws in a labeled envelope. Small preparation helps.